
Wondering how to grow your own bean sprouts for pennies at home? This blog post will provide a simple step-by-step guide on how to grow this crunchy and nutritious vegetable at home, with virtually no hassle!
Bean sprouts are a versatile ingredient that can be used in many dishes: salads, Vietnamese pho, stir-fried noodles, you name it. They are low in calories and full of nutrition. According to WebMD, bean sprouts have high concentrations of Vitamin C, can help prevent and treat high blood pressure, and are a source of insoluble dietary fibre. Most bean sprouts that we consume come from mung beans and soybeans. You can buy bean sprouts from the grocery store. But why not try growing them at home?
You will need
- 1.4oz/40g (about 2.5 tablespoons) of dry mung beans or soybeans. You can find them on Amazon and in many grocery stores and Bulk Barn. If this is the first time you are trying this, I recommend that you only buy a little bit at Bulk Barn to experiment with.
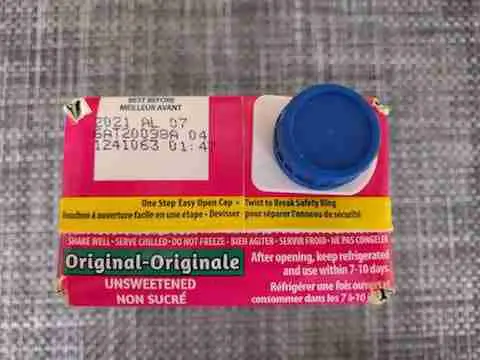
- An empty rectangular carton with a mouth (like the one below; I happened to have some Almond Breeze containers, but anything that looks like this will work perfectly).
- A pair of scissors
- Water
Here is a possible container you can use

Steps:
- Wash your container thoroughly with water.
- Soak your mung beans in room-temperature water overnight. They should appear a little bigger after soaking.
- Open the mouth of the carton and drop the mung beans into the carton.
- Use a pair of scissors to cut open four small holes, one on each corner of the top of the carton (see picture below for illustration)
- Rinse the mung beans with water twice daily, once in the morning and once at night. I recommend that you let the water flow out from the four holes that you cut out with the scissors instead of the mouth to prevent the mung beans from flowing out. Note that the beans should not be soaked in water for a prolonged period of time.
- Store the carton (with beans and no water) in a cool and dark place.
- Your bean sprouts should start to grow after two days.
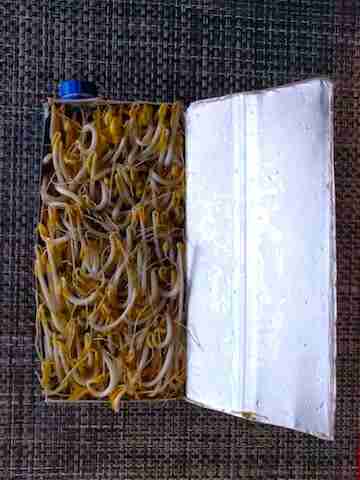
- After 5 days, you can cut open the container, and you will be presented with some beautiful bean sprouts!
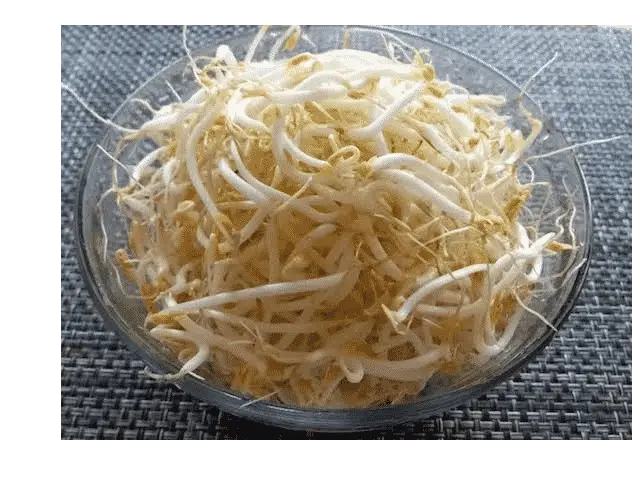
- Given the sprouts a thorough rinse, and they are now ready to be added to whatever dish you are craving!
Supplemental image illustrations:
Step #4: What the four holes should look like from the top
Step #9: What the bean sprouts look like after 5 days after you cut open the container
Step #10: Final product
Super easy, isn’t it! I hope you all give it a try. It is a super fun and inexpensive DIY product perfect for when you are staying at home!